V150 Direct Result Files Access Via USB
Downloading/Copying Test Results to a PC/Tablet, using a USB cable, by allowing Direct File Access, to make the test set act as an attached storage device.

At VeEX, we know the importance of having access to mission-critical test results and reports. Our products strive to provide as many ways as possible to access those files, addressing most of the scenarios our users may encounter. That includes using the NoApp™ QR code results transfer, standard web browser (Web Access, Web Remote, and EZ-Remote™) and FTP Upload over LAN, WLAN/Wi-Fi, 4G/5G access point or tethering, direct Ethernet cable connection, or using the test set’s access point (AP) function to build its own impromptu private WLAN. There is also the VeSion® R-Server cloud service and direct export to an attached USB memory stick. Although those are plenty of ways to get test results from a test set into a computer, server or cloud, there may still be certain cases in which many of these options could be restricted for IT for security reasons. For example, Wi-Fi may not be allowed in some communication equipment rooms and USB memory sticks may be banned from some secured facilities.
This guide describes another alternative that could be used in case the previously listed methods are not possible or allowed: Connecting the test set directly to a PC or tablet, using a USB cable.
Accessing Test Result Files Via Direct USB (Cable) Connection
The V150 series of test sets offer a built-in alternative to USB memory sticks: The USB Shared Results File Access. This “OTG Device” mode makes V150 test sets act like a USB storage device, when connected to a computer or tablet. It provides between 1 to 9 Gigabytes of available shared storage. It only requires the appropriate micro-B USB (male) to USB-A or USB-C (male) OTG cable and changing some settings in the V150 test set.
USB On-The-Go (OTG) is an industry standard specification that allows devices to act as either Host or Device (accessory or dongle).
The following procedure uses an MTX150x as an example, in which the test set will act as an external storage device to the PC (e.g., like an external HDD or memory stick). Note that the user interface may vary slightly from product to product or by software versions, however the flow should be very similar. Upgrading to the latest version available is recommended.
First, activate the Results Sharing function, so newly saved test results get copied to a shared partition in the tests set’s internal storage.

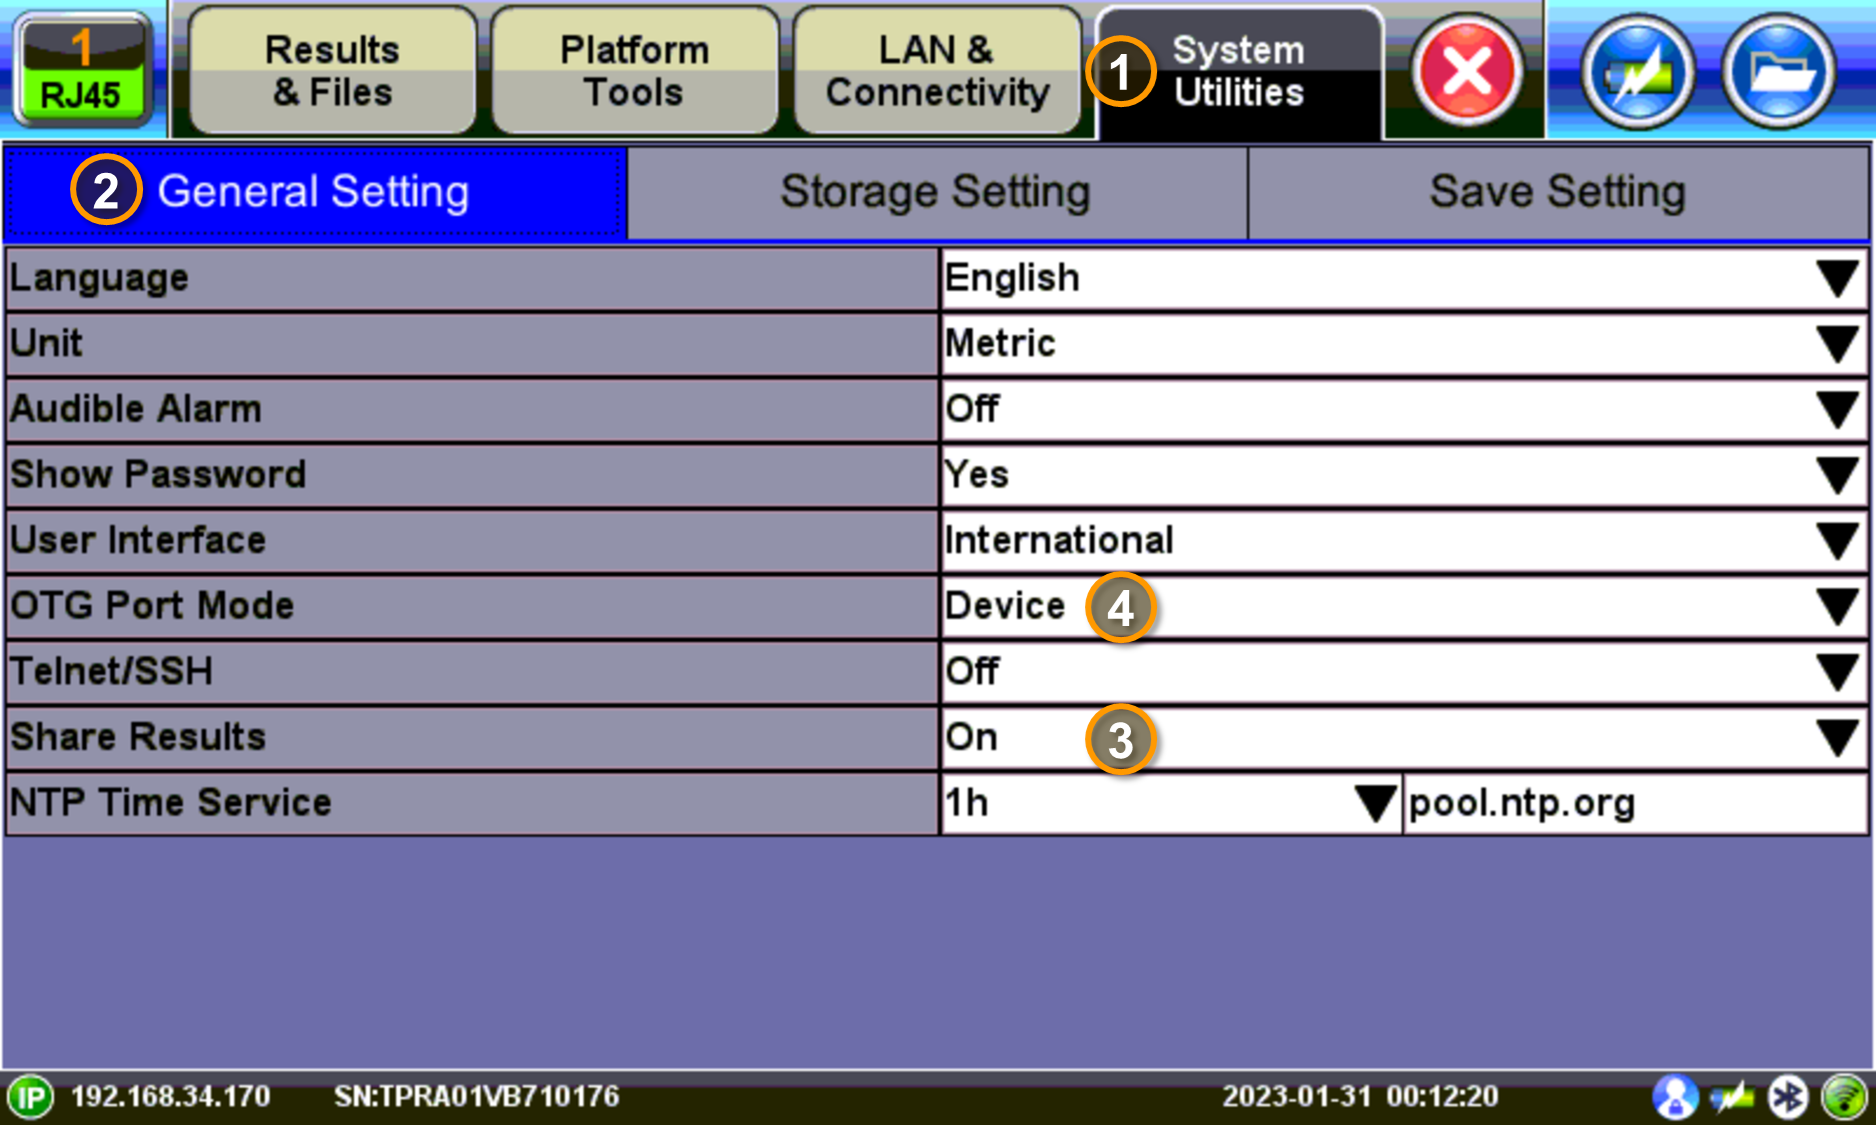
- Go to >Tools >System Utilities >Global Settings.
- Select the General Settings tab
- Set Share Results (Access via USB) = ON, then tap on OK to confirm the selection to start storing copies of new test results in a public/shared storage partition. For extra convenience, this setting may also enable the automatic PDF generation for every saved file.
- When ready to connect to the PC, set the OTG Port Mode to Device mode (don’t forget to set it back to Host mode when finished). This step may not be required for all V150 test sets, since some of them may offer automatic OTG mode detection (automatic Host / Device mode).
- Connect the micro-B USB side of the OTG cable to the test set and the other USB-A (male) end to the computer.
- On the test set, tap on the OK button when prompted to Allow external access through USB OTG port.
- In the rare event that the Windows™ computer may initially fail to mount the storage partition and asks to perform a Scan/Fix/Repair routine, follow the computer’s ‘Fix’ instructions to get it properly detected.
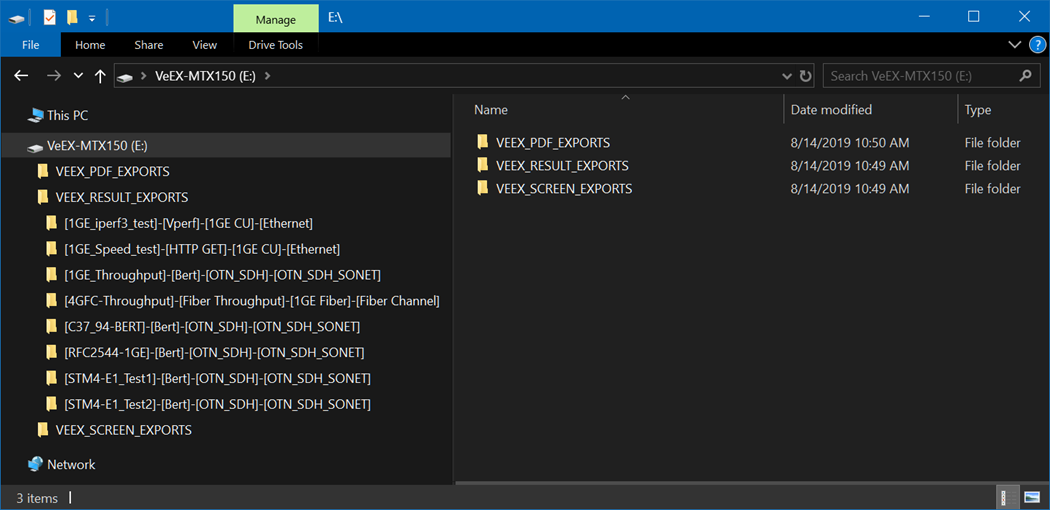
- Once the computer’s File Manager opens, it will display sub-folders for Results, PDF Reports, Screenshots, etc. At this point, files and folders can be simply dragged and dropped using the computer’s mouse or touchpad.

Notes:
- While the test set is sharing the test results saved in its internal storage partition with a computer, via USB, any new saved test results, or screenshots, may not be accessible (visible) to the computer until the next connection.
- When new results are saved, the automatic PDF generation and export is performed in the background. For certain applications, this process may take a few seconds to complete. The test sets may prompt users to wait until the process finishes.
- While Share Results (Access via USB) is ON, any file transfers performed with the test set’s File Manager export To USB
 function, will go to the internal drive partition (not to any external USB memory stick attached to the test set). This can be used to copy previously saved test results to the shared partition.
 - Use micro-B USB to micro-B USB or to USB-C cables to connect the test set to tablets or smartphones that allow external file access.
The V150 Family of Handheld Test Sets

- CX310 CATV/HFC/DOCSIS 3.1 Installer test set
- FX120 XGS-PON Analyzer
- FX150+ Mini OTDR for FTTx, PON & Metro Fiber Networks
- FX180X xWDM Optical Channel Checker (OCC)
- MTX150 Multi-Service Installation & Maintenance test set (Ethernet and Transport)
- MTX150x Ethernet & Internet test set
- MTX150x-Lite Internet QoE test set
- WX150 Wi-Fi 6 Air Expert test set
