
Brief Introduction
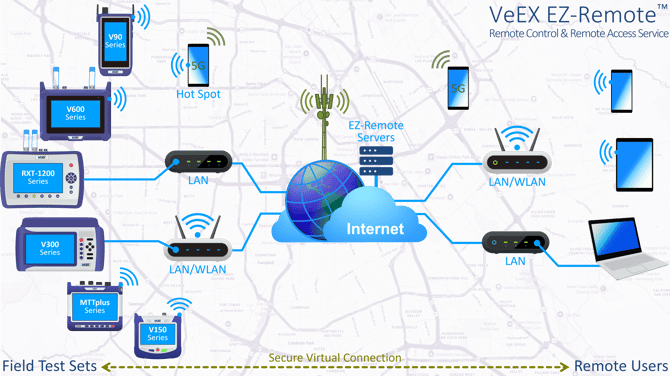
Available worldwide, EZ-Remote™ is a secure cloud-based mirroring service provided by VeEX Inc. for some of its portable field test sets. The basic service is provided free of charge and allows users to access and operate test sets from remote locations or on different networks, for remote operation, test report access, collaboration, training, mentoring, support, expert analysis, troubleshooting, etc. It offers the following features:
- Remote Control - Let remote users operate test sets from a remote location, as if they were in front of the instrument, using a standard web browser from a PC, tablet or smartphone, via an internet connection. No app, installation or settings required.
- Remote Access - Allows remote users to access, view, manage and download test results, test profiles and screenshots. Once connected to the instrument, remote users can View, Download, Delete, generate PDF, Search and Filter, directly on the test set from the remote PC/Table/Phone. (The remote software update function is not available in EZ-Remote mode.)
No App, registration, sign-in, or subscription are needed and no user identifiable information is exchanged or collected. The basic best-effort, as-is, as-available service is offered free of charge (Terms and Conditions).
Local Web Remote/Access is an efficient alternative to the "long distance" EZ-Remote, when the test set is connected to the same LAN/WLAN environment as the controlling device (or when the remote user has VPN access to the remote LAN/location that the test set is connected to). If the test set's "local" IP address is reachable from the PC/Tablet/Phone, just enter its IP address or its host name on any standard web browser to gain access to the test set. This feature also offers the added ability to push software updates to the field test set. Refer to the sections below for more information.
1. Connect Test Set to the EZ-Remote Service
Connect the test set to the Internet using its WLAN (Wi-Fi) or LAN management ports and verify it gets a valid local IP address and internet access. A physical LAN connection is recommended for long-term applications. The assigned local IP address is displayed on the lower-left corner of the screen, confirming connectivity. However, that private LAN IP address is normally not accessible from other networks, unless a VPN is used. The purpose of the EZ-Remote service is to provide remote connectivity, data access and remote control user interface from any remote location (different network).

First, change the default Password. Go to >System Tools >Utilities >Settings (>More) >Remote Access and enter a customized password in the VNC Super User Password field. (The menu location may vary from product to product.)
Then tap on the EZ-Remote application.

Leave the default values, as shown below.
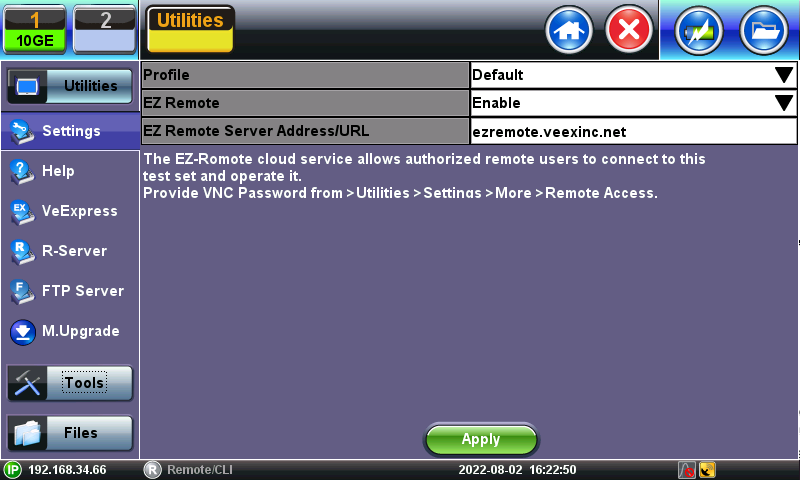
Press Apply, to establish the connection to the remote registration server and wait for the confirmation page.

Share the Session ID and Password with the people you want to grant remote access to the test set. For convenience, the local user can use the QR scanner app built into their smart phone or tablet to automatically generate an email or SMS/text message, which can be edited and sent to the intended remote user(s). Edit the template message as required, to include customized password (replacing the "call me" text), add instructions, comments, information about the test setup, and environment, etc.
Plug in the test set's AC/DC charger if the remote user will be connecting later on, or if the test set is to remain accessible overnight or for multiple days.
2. Connecting to the Remote Test Set
2.1 Manual Connection with Session ID and Password
If the individual ID and Password session credentials were individually shared over a phone call, chat, text message or email:
- Open a web browser
- Type the EZ-Remote server URL https://ezremote.veexinc.net/
- Enter the Session ID in the Serial Number field
- Enter the Password (case sensitive)
- Check the box to agree on the Terms and Conditions
- Click on Connect

2.2 Connecting from Automatically Generated Messages
If the Email or Text message were automatically generated, using the QR codes, click on or copy the unique link (URL) included in the message, to point the web browser to the dedicated EZ-Remote session.
- Enter the Password (case sensitive)
- Check the box to agree on the Terms and Conditions
- Press Connect
3. Using the Remote Test Set
Once connected, the remote user can access and control the test set.

The red ≡ button opens up the Menu.
3.1 Remote Control
Use the mouse (PC) or touch screen (tablet, smartphone) to navigate and operate the test set as normally done locally.
The hard buttons, found on the test set's front panel, are mapped as soft buttons below the screen image. Tap on them to access their original functions.
By default, the built-in VNC server supporting the Web Remote functionality is always available in the background and ready to be accessed at any time by a web browser or VNC client app.
If required (e.g., for security reasons or IT policies), the remote control function can be disabled by going to >Utilities >Settings >More > Remote Access and set VNC Services = Disabled.
3.2 Remote Access
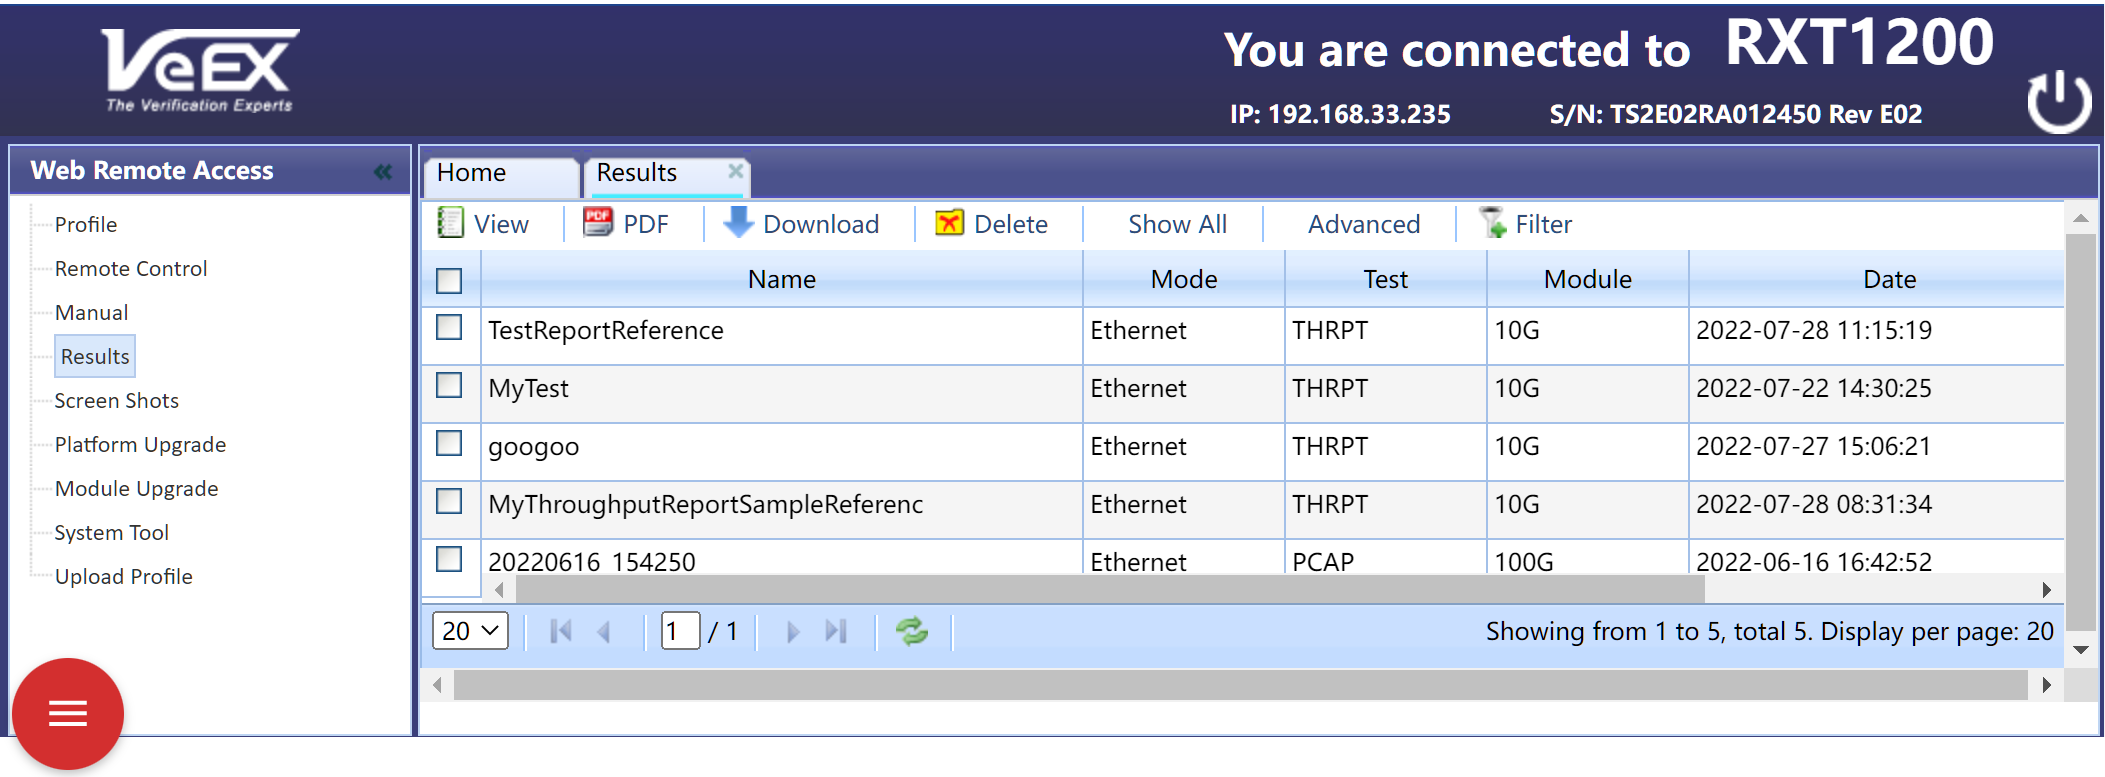
Provide access information stored in the remote test set, such as Test Results, Test Profiles, and Screenshots. Users can select, view, download, generate PDF, or delete these files. (Software upgrade is not available over EZ-Remote Access).
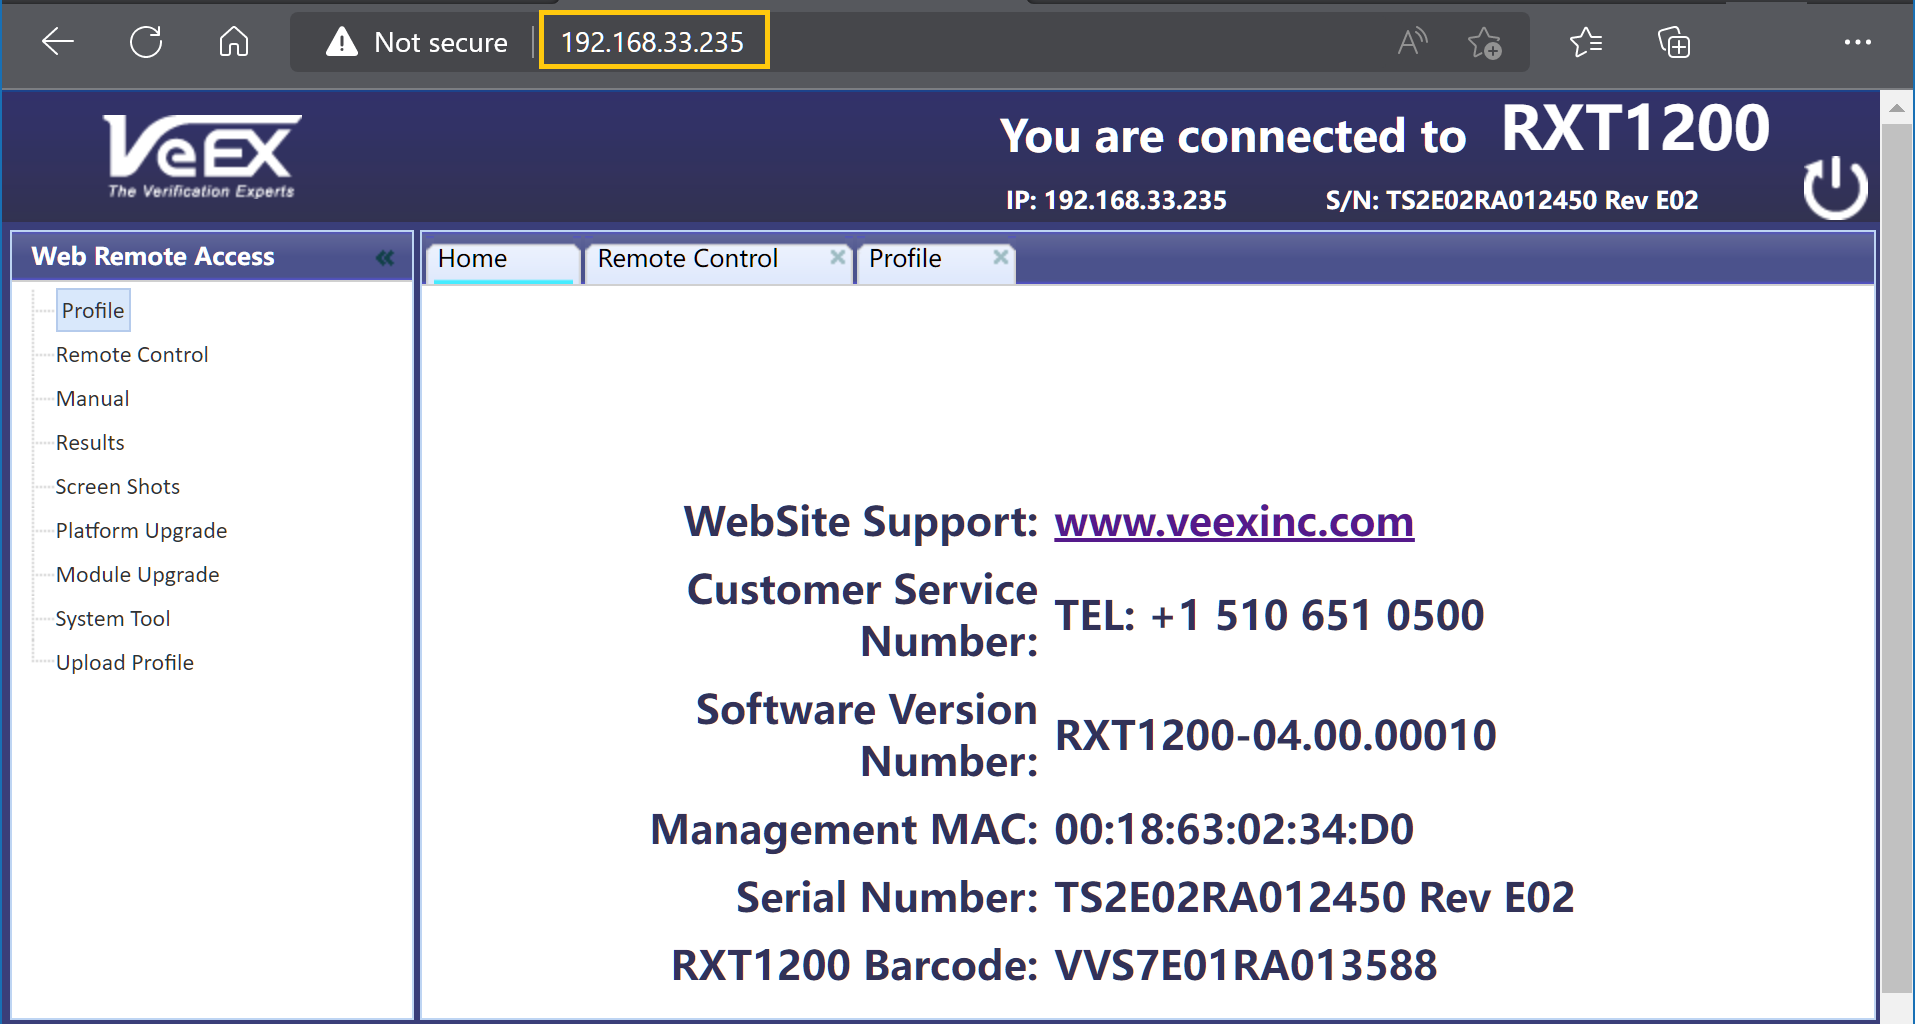
This page also allows users to identify (confirm) the product they are connected to, by its VeEX platform identifier (name) and serial number. The built-in manual for the test set is also available.
4. Web Remote for Local Access and Control
If the test set is on the same LAN or WLAN (Wi-Fi) as the remote user, or the user has VPN access to the remote network the test set is connected to, there is an easier and faster way to control it. Just enter the test set's private IP address (or its Local Host URL, if supported) on the URL field of any industry-standard browser (or trusted VNC client app for remote GUI control/mirroring only).
It offers Web Remote and Web Remote Access features (no client installation required), providing full control of the test set and have access to test result files and screenshots.
Remote software upgrade functionality for platforms and test modules is available in this mode. If performing remote system or platform upgrades it is recommended to enable the [√] Auto Reconnect after Reboot selection before starting the EZ-Remote session, so the test set automatically re-registers and becomes available for further remote access. Also, if the test set is connected to the internet via Wi-Fi, make sure it reconnects to the WLAN after a reboot, before attempting a remote upgrade (software updates may reset some settings, including stored Wi-Fi passwords). The use of wired LAN is recommended in this case.
5. Related Materials
Quick video guide on how to start EZ-Remote and share the login information, using the QR codes.
Example of EZ-Remote using the CX310 test set