VeEX's PC Application GUI Doesn't Look Right in Windows™ (Not Rendering or Displaying Correctly) - Compatibility Mode
Certain legacy software applications may no longer render correctly in high resolution screens (e.g., 4K UHD) or with custom zoom or DPI settings. Change the compatibility mode settings to fix it.
Some software applications, originally developed for Windows XP, 7 or 8 may not display correctly, when used in Windows 10 or 11 systems with high-resolution screens (e.g., WUXGA, 4K/UHD). Custom zoom and DPI settings may also affect how applications are rendered on screen. If their GUI doesn't seem to display correctly (e.g., misalignment, truncated text, hidden buttons, etc.), their compatibility mode may need to be adjusted.
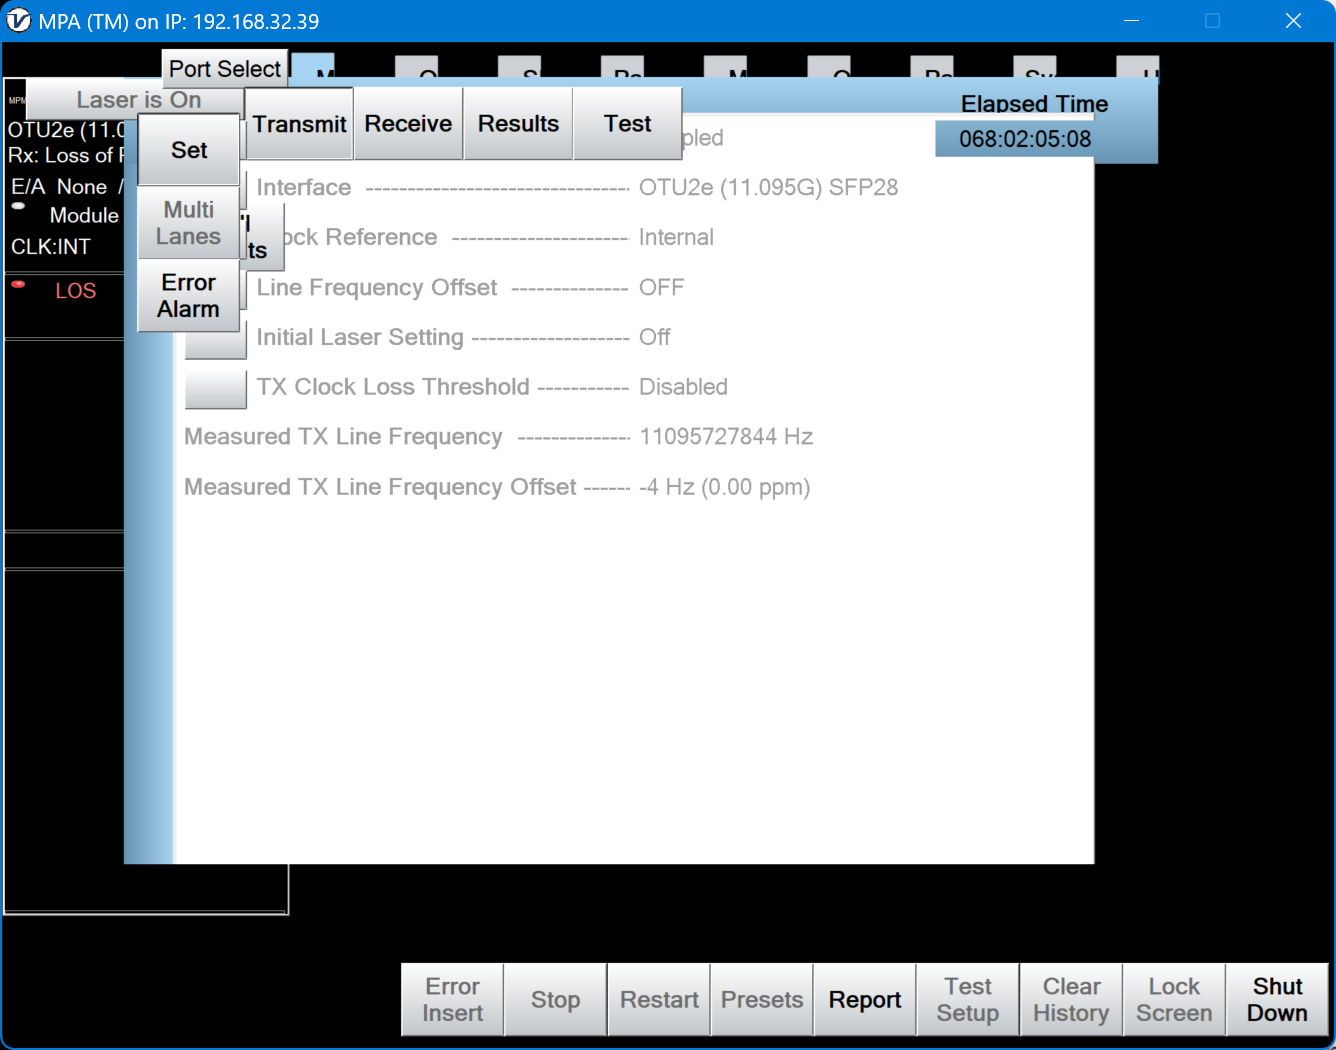
For example, a window (GUI) from a legacy PC application may look like this:

Since temporarily changing the resolution or DPI settings of your Windows system would not be a good idea, we recommend trying this first (Windows 11 example):
- If you have a shortcut on the desktop for the application in question, right-click on it and select Open File location, to find its executable (.exe) file.
- Right-click on the .exe application icon and select Properties.
- On the Properties window, select the Compatibility tab.
- Click on Change settings for all users.
- (Optional) For older applications, you could try checking the Run this program in compatibility mode for: box and select Windows 8 from the pull-down menu. (Try selecting Windows XP for older applications.)
- Click on Change high DPI settings.
- Check the Override high DPI scaling behavior box and select System (Enhanced). Click on OK.
- Click on Apply and OK.
- Click on Apply and OK.


Try running the application again. Some systems may require some more experimentation, such as checking the Program DPI box.
This is the expected result:

Note that Microsoft Windows may sometimes fail to apply the settings correctly on future reboots. You may have to go through the Compatibility settings once again (even if nothing has changed), to re-apply them, then launch the PC application again.
