
When testing high-speed links or interfaces requiring optical transceivers, the laser may be turned off by default as a safety precaution, even though most common optical transceiver interfaces are considered safe.
First, become familiar with the test set's user interface and identify three important elements related to the xSFP's laser transmitter (Tx) and receiver (Rx). This applies to OSFP, QSFP-DD, QSFP56, QSFP28, QSFP+, SFP-DD, SFP56, SFP28, SFP+, SFP, etc.
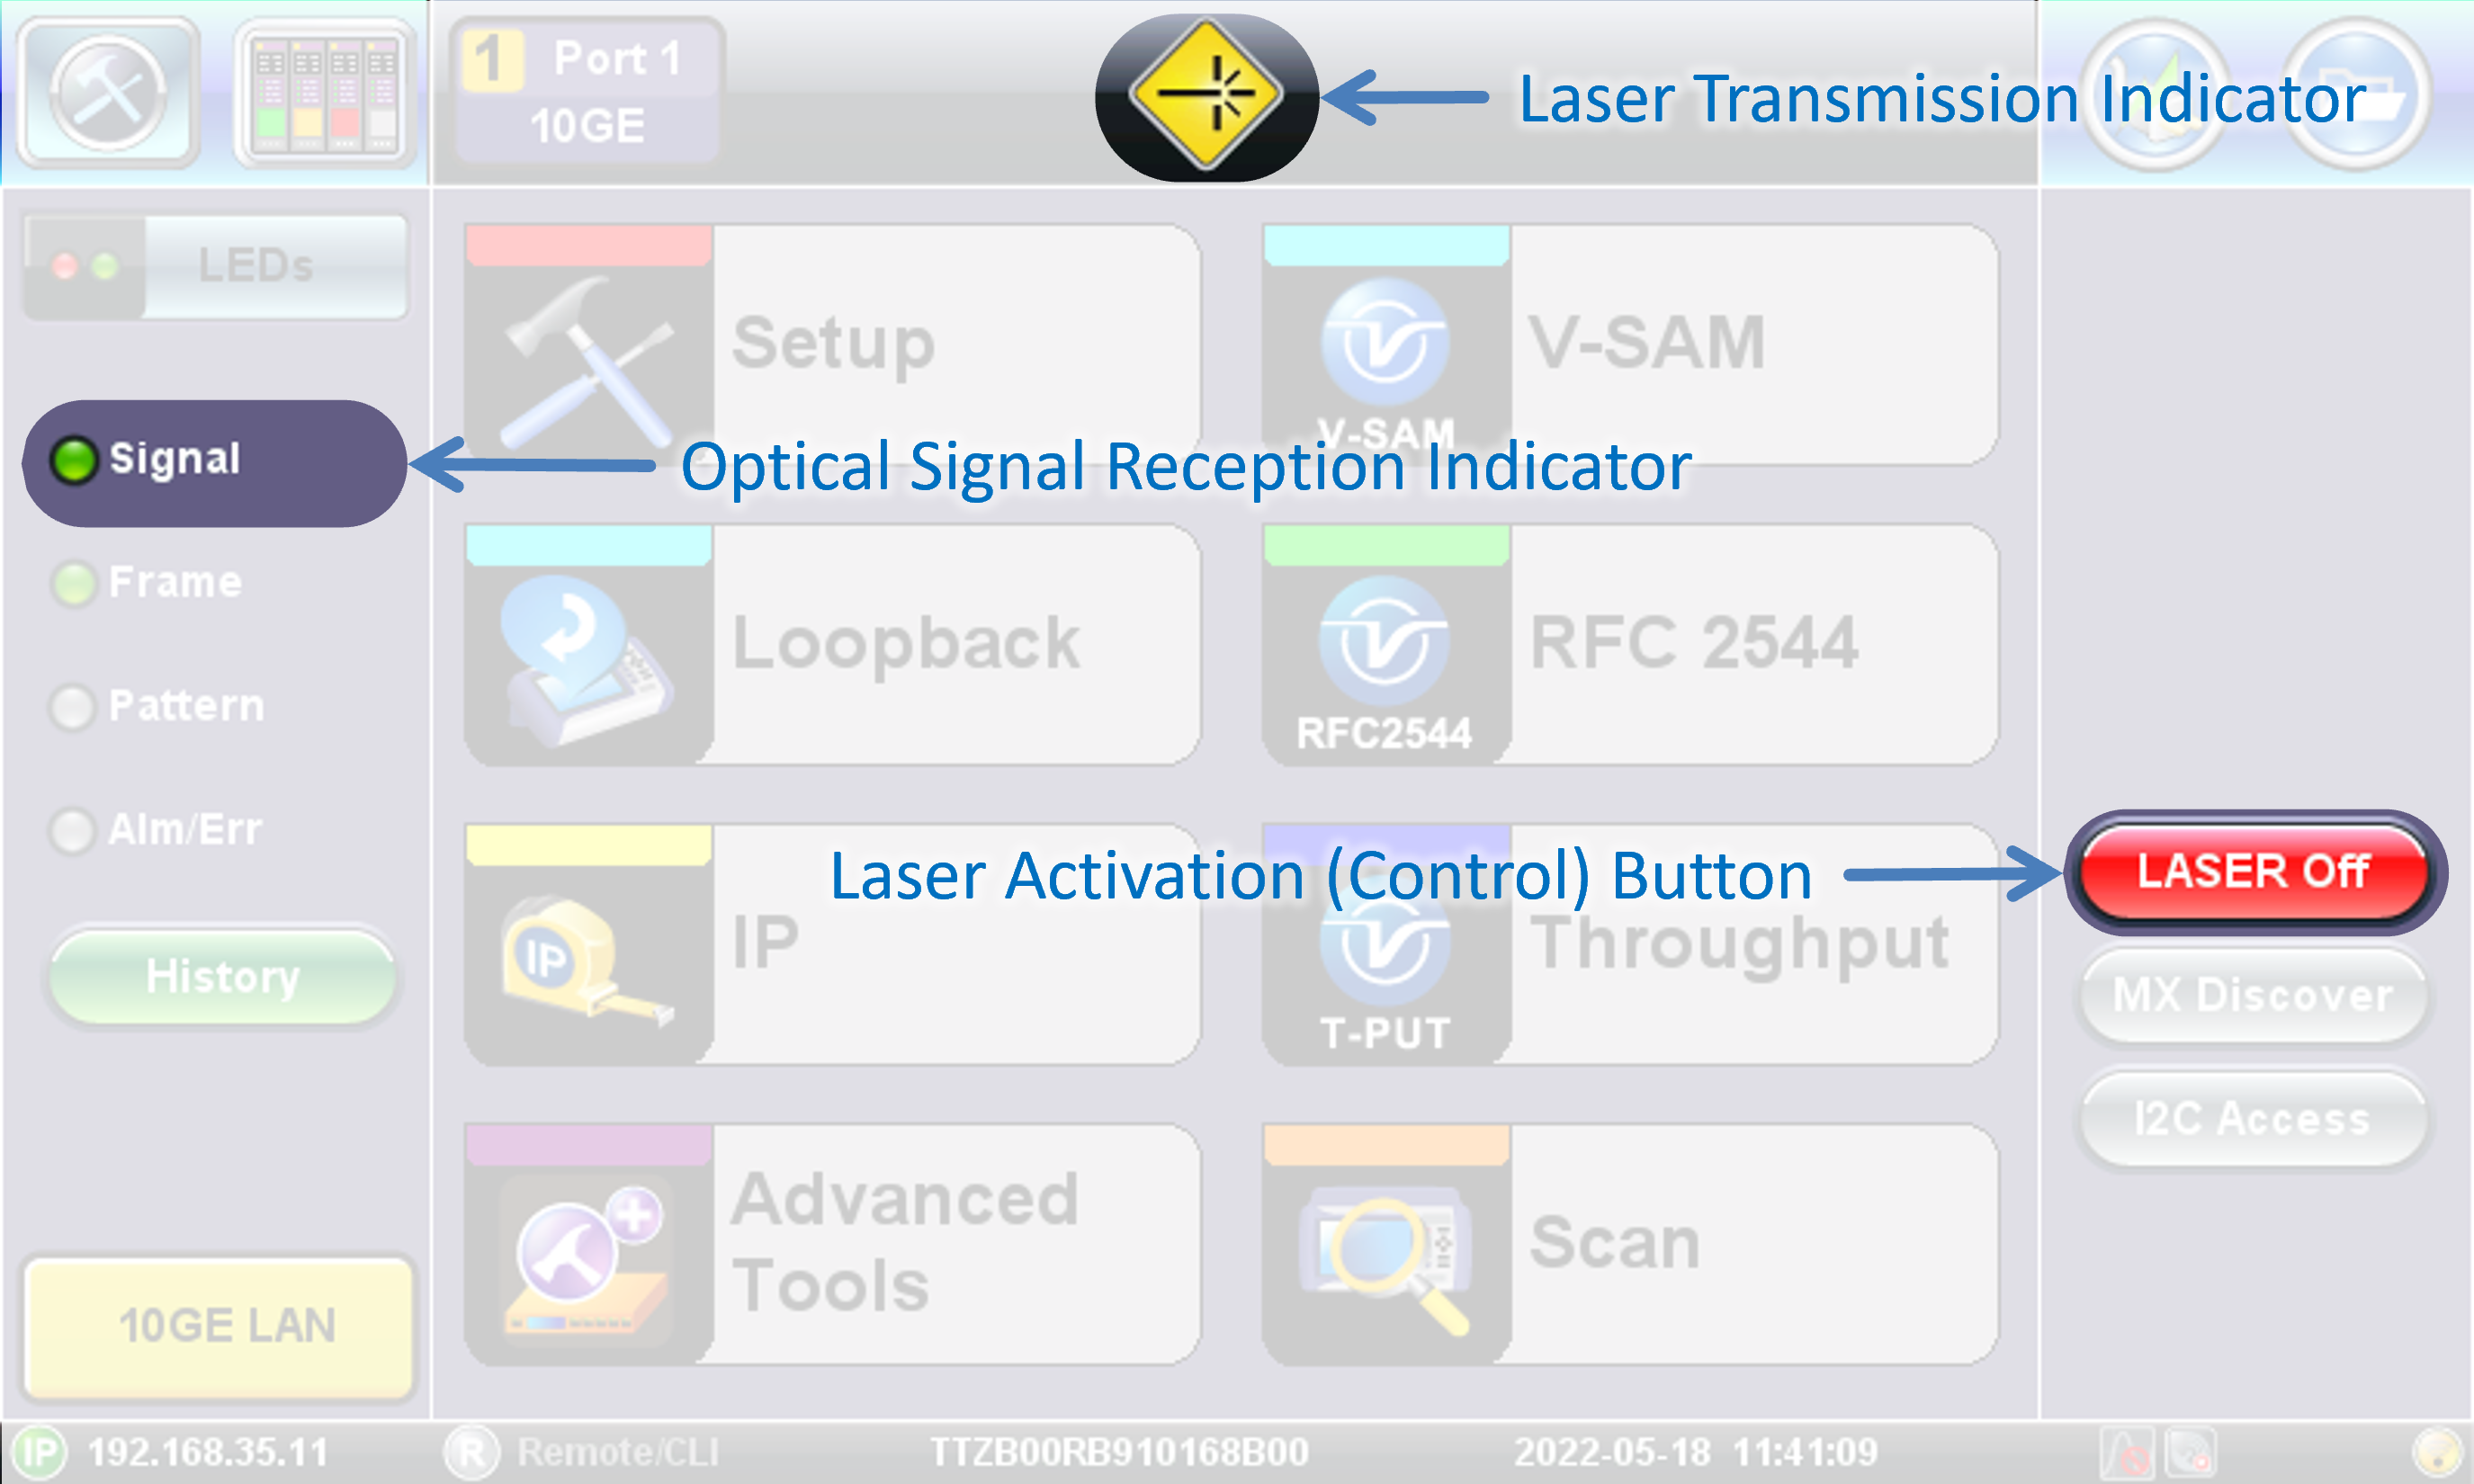
The Laser control button is on the right
- When the grayed-out Laser ON button is pressed, it sends the command to the transceiver to turn its laser ON. Then the button turns red, as an indication that the laser is active.
- When the red Laser OFF button is pressed, it sends the command to the transceiver to turn its laser OFF. Then the button turns gray, as an indication that the laser is not active.
- The button could also be labeled Laser ON/OFF. In that case, the red color would also be an indicator that the Tx laser is ON.
The yellow Laser Indicator on the top bar shows the current status of the transmitter, indicating whether the laser is turned ON or OFF.
Here is a summary:

If you fear that the transceiver's Tx laser may not be working correctly, you can turn the Laser ON and use a fiber optics patch cord to connect the transceiver's Tx to the Rx (loopback). Then check the Signal soft LED on the left. If it turns green, then the Tx laser is working correctly.