
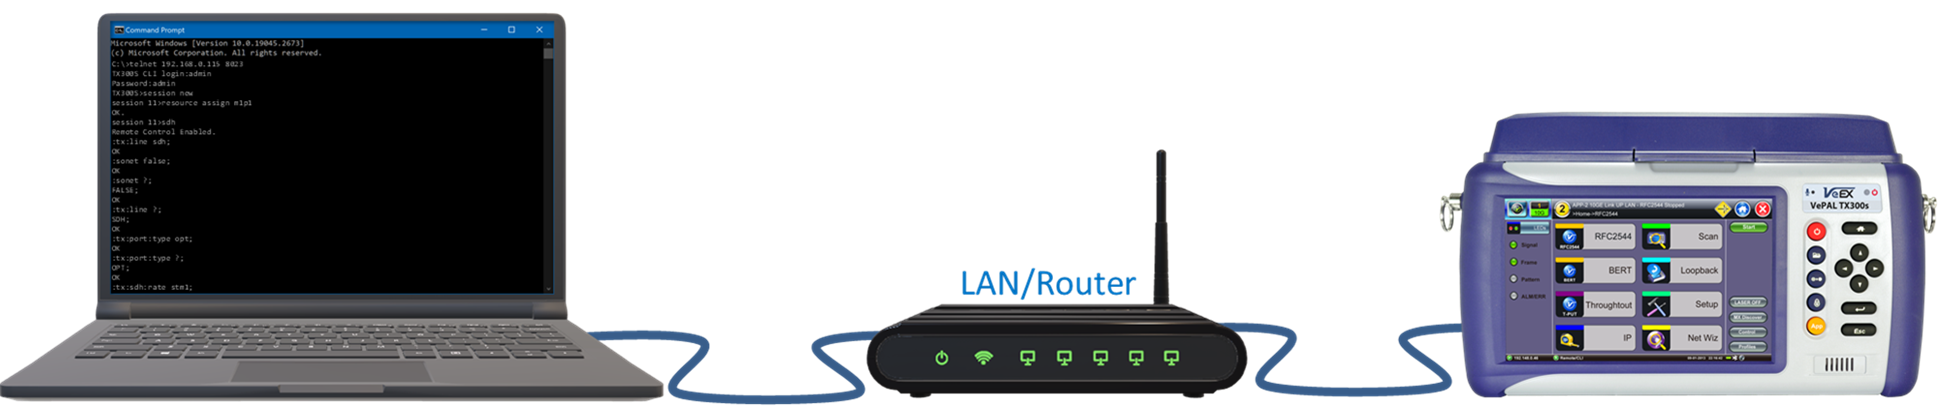
From the end users' point of view, the test sets' Telnet and SSH connections are limited to be used as command line interfaces (CLI) for automation/scripting purposes, using SCPI commands. Internally, VeEX's Customer Support, R&D and Manufacturing teams use telnet/SSH and scripts as tools for automating validation, regression, production tests, diagnostics, root cause analysis and troubleshooting of test sets and test scenarios (locally or remotely).
This article presents some examples, using manually entered prompts on a simple Command (cmd) console, just to illustrate the process of establishing a telnet or SSH connection with VeEX's portable test sets or test probes, which readers can easily expand and integrate into their own scripts or macros.
The legacy Telnet functionality is only offered for backwards compatibility purposes, to accommodate older scripts. However, the use of Telnet is NOT recommended due to its lack of native security. Use or migrate to SSH instead.
 Keep general Telnet/SSH functions disabled when not being used, to reduce the exposure, since brute force attacks are always a risk for any connected device.
Supporting Test Platforms
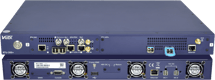
The following product families are examples of VeEX test platforms supporting user-accessible Telnet and SSH connections:
- Portable Test Platforms: V150, MTTplus, V300, RXT-1200, AT2500, MTX6xx



- Remote Test Units (probes): RTU-300, RTU-300+
1. Setting Instruments for Local or Remote Connection
Connect one of the test set's Management interfaces to a LAN/WLAN and establish an IP connection. Although this can be achieved in several ways (via direct patch cord, LAN, Wi-Fi), this document focuses on, and recommends, the use of LAN connections with static IP, using the test set’s Ethernet (RJ45) management port. The use of a direct isolated LAN connection to the test set is recommended for scripting environments. The TX300S (V300) test platform was used to capture some of the examples shown in this article.
Note: DHCP mode is also supported, however it is only recommended for non-critical temporary control of local test sets (same applies to Wi-Fi). In such scenarios, if users have the need to reboot or power-cycle remote test sets, the dynamically assigned IP address could change and the test set could become unreachable, requiring manual intervention.
Notes:
-
If the controlling PC and the test set are in different locations, networks or network segments/subnets/domains, the controlling PC may need to use VPN access to the target LAN (if the LANs are not already interconnected).
- Handheld and portable field test sets are not meant for long-term, always on (24/7), mission-critical applications, such as manufacturing and monitoring. For those scenarios, rackmount test heads (probes) or remote test units (RTU) are recommended.
1.1 Connecting Test Sets to a Local Area Network (LAN)
Both, the test set and the controlling PC should be on the same LAN (or PC connected through VPN) in order to connect to each other, unless the test set is assigned a routable (public) IP address, which is not recommended.
- Connect the test set’s LAN (management) port to an Ethernet data outlet or router/switch/modem port
- From the HOME page select
 or
or  >System Utilities >Tools >IP Tools
 - On the Setup tab
- Set Port to Management Port
- Set IP Address to Static (or DHCP if required)
- Enter the valid IP address in Local IP. Make a note of the entered IP Address (e.g., 192.168.0.115). This parameter (argument) will be referred as <tester_ip_addess> in the command line examples.
- Press the Connect
- The test set's IP address will be displayed on the bottom-left corner of the screen.
1.2 Enabling CLI on the Test Set
For cyber security reasons, the test set may block incoming Telnet and SSH connection requests by default. To enable these connections, go to >System Utilities >Utilities >Settings >More >Remote Access (menu location may vary from product to product).
Enable the Command Line Interface (CLI) services.

Make sure to customize (change) the default CLI Admin Password. The use of the default password setting is not recommended.

Enable Telnet and SSH services only if instructed by VeEX's Customer Support team while troubleshooting any technical issues with the instrument. This general functionality is not required for SCPI remote control. For cyber security reasons, keep Telnet/SSH Disabled at all times, especially if the test set's management port is connected to a public IP address or has open Internet access. Make sure the test set is connected to a secured or isolated network!

Although manually typing commands on a terminal emulator is not recommended, due to the complexity of the commands and likelihood of typos, this guide uses it for training purposes, only for the examples shown, since it helps understand and familiarize with the step-by-step process. The use of a scripting languages is recommended for the final application. With that in mind, for exploring and experimenting with the session process and CLI, from a PC, you may use a dedicated terminal emulation application or simply launch Windows Command line, when manually testing or experimenting with commands.
Whether it is Telnet or SSH, users only get restricted access to the SCPI CLI interface, through one specific TCP port, not to the system/kernel, OS, or file system. For security reasons, some test sets may disable their general Telnet and SSH functionalities after every power cycle. However, this doesn't affect the restricted sessions used by the CLI/SCPI remote control features.
Refer to the How to Prevent or Minimize Telnet (Cybersecurity) Vulnerabilities article before continuing.
2. Connecting to the Test Set
2.1 Establishing a Telnet Session - No Longer Recommended
The following procedure describes how to connect to the test set via Telnet session, by using Windows Command line functions or any terminal emulation application. The Command Prompt window is used for the examples in this article, because the manual step-by-step process helps illustrate it more clearly.
Open the Start or Search menu on the PC, launch the Command Prompt (cmd) application, type the command telnet <tester_ip_address> <port> and press Enter. The SCPI command interface uses telnet port 8023.
telnet <tester_ip_address> <port>
<tester_ip_address>   It is the test set’s management port IP address
<port>                8023
Note: The LAN management port IP address is often displayed at the bottom-left corner of the screen.
Users only have telnet access to the SCPI command line interface, through TCP port 8023, for remote control purposes. No access to the OS/kernel, root, file system or any other system resources are allowed.
Windows command example:

This brings up the telnet session on a Command window, with the portable System and Administration’s command line interface (CLI).
Enter the User ID in CLI login followed by the Password.
- The default values are CLI Login = admin.
- The Password is available in >System Utilities >Utilities >Settings >More >Remote Access and the default one shall be changed with one customized by the user.
 It is highly recommended to change to a stronger password before starting to use the test set, especially if the test set’s IP address could be accessed from public networks.
Once the test set prompt is displayed (e.g., TX300S>), users can start sending commands to the test set.
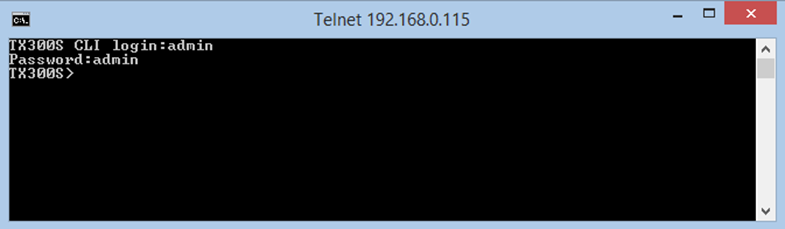
Example:
C:\>telnet 192.168.0.115 8023
TX300S CLI login:admin
Password:admin
TX300S>session new
session 11>resource assign m1p1
OK.
session 11>sdh
Remote Control Enabled.
:tx:line sdh;
OK
:sonet false;
OK
:sonet ?;
FALSE;
OK
:tx:line ?;
SDH;
OK
:tx:port:type opt;
OK
:tx:port:type ?;
OPT;
OK
:tx:sdh:rate stm1;
OK
:tx:sdh:rate ?;
STM1;
OK
:tx:laser 1;
OK
:tx:laser ?;
TRUE;
OK
Note: Some versions of Microsoft Windows® may also have the TELNET feature turned OFF by default, so the telnet command may not be recognized on all PCs. To activate the telnet feature, go to >Control Panel >Programs and Features, then select Turn Windows features on or off. A pop-up window will open. Check the Telnet Client box and press OK. No reboot should be necessary.
2.2 Establishing a Secure Shell (SSH) Session - Recommended
Starting with version 03.06.03 (2021), the TX300S platform allows SSH connections for CLI sessions to be initiated by end users, as administrators. Other products followed, however not all test set allow SSH access for end users. To manually try it, open the Start or Search menu on the PC, launch the Command Prompt (cmd) or a terminal emulation application, then type the command SSH admin@<tester_ip_address> -p <port> and press Enter. The SCPI command line interface (CLI) uses the TCP port 8024 for SSH.
SSH admin@<tester_ip_address> -p <port>
<tester_ip_address>   It is the test set’s management port IP address
<port>                8024
Although the user ID is called "admin", users only have SSH access to the SCPI command line interface, through TCP port 8024, for remote control purposes. No access to the OS/kernel, root, file system or any other system resources are allowed.
Example:
C:\Users\VeEX>ssh admin@192.168.41.109 -p 8024

The authenticity of host '[192.168.41.109]:8024 ([192.168.41.109]:8024)' can't be established.
ED25519 key fingerprint is SHA256:BlRo+9v9z6yH+gHLrUeAexxg1jcMVu0M5iWAUuDKP5Q.
Are you sure you want to continue connecting (yes/no/[fingerprint])? yes
Warning: Permanently added '[192.168.41.109]:8024' (ED25519) to the list of known hosts.
admin@192.168.41.109's password:admin

TX300S CLI login:admin
Password:admin
TX300S>help
available commands list:
       session, used for session management
       resource, used for resource management
       info, used for query date|time|version|serial number
       reboot, used for reboot the system
       telnet, telnet services control
TX300S>session new
session 11>resource assign m1p1
OK.
session 11>sdh
Remote Control Enabled.
:tx:line sdh;
OK
From here on, the controlling user/script must switch to the application specific set of SCPI commands, sequence and hierarchy to configure and run tests.
3. Controlling Test Applications Via SCPI
For further details refer to Controlling VeEX Test Sets Via (SCPI) Command Line Interface or Scripts.