
Remove the battery cover and battery pack
 It is highly recommended that you do the battery replacement one unit at a time.
 If the serial numbers do not match, locate the correct battery cover for the unit.
 Pay attention not to damage the battery pack protective wrapping when removing the Velcro.
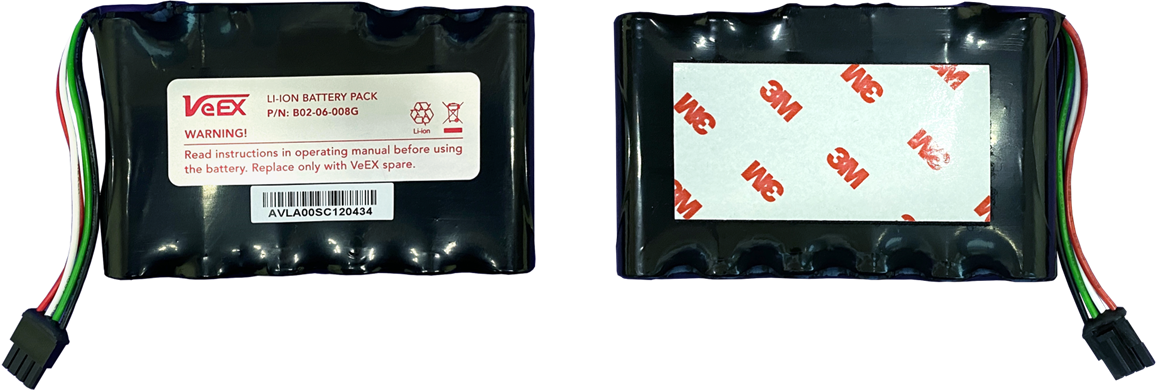
 Dispose of the removed Li-Ion battery pack properly in accordance with the local regulation requirements
- The battery pack is installed on the back of the unit and is hidden by the battery cover on the back of the test set.
- A new B02-06-008G Battery Pack comes with a Velcro strip on the back to affix the battery to the unit inside the battery compartment.
- Do not connect AC adapter to the unit.
- Power off the unit.
- Put the unit with LCD facing down on a flat surface. Keep the LCD clear from any objects on the flat surface to avoid damaging the LCD.
- Locate and use a Philips screwdriver to undo the two battery cover screws at the bottom of the unit. Lift to remove the battery cover in the direction as indicated by the OPEN marking on the cover.
- Safe keep the two screws. It is recommended to tape the two screws to the removed battery cover so that they will not be misplaced.

- After removing the battery cover, remove the battery by slightly waggling the battery pack off from the Velcro attachment.
- Check if there is a serial number sticker affixed on the back chassis case. Checked that the serial number matches the one on the removed battery cover.
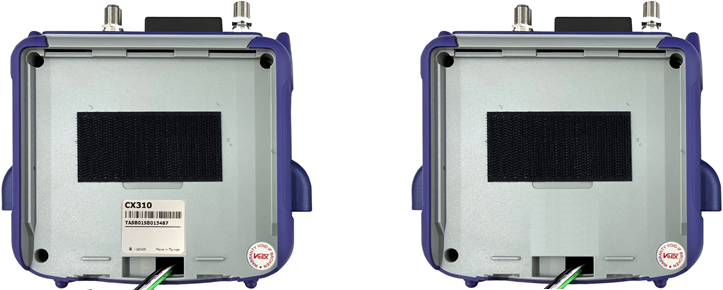
- Some units may not have the serial number sticker affixed. If a serial number sticker is not there. Power on the unit, go to the Utilities > Settings > About screen to check the displayed serial number matches the one on the removed battery cover.
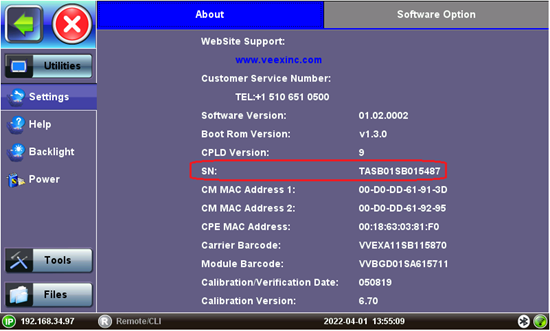
-
If there is no serial number sticker it is recommended to put a sticker with serial number written to identify the unit, especially if there are more than one units with battery covered removed.
Disconnect the old and install new battery
- Carefully disconnect the battery.
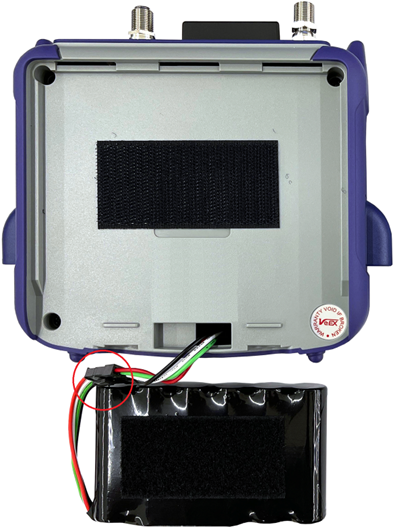
- Check the condition of the Velcro strip affixed to the chassis. If the Velcro strip is not well adhering to the chassis, remove it and clean the surface. Remove the hock side of the Velcro strip from the new battery.
- Connect the new battery to the test set by aligning the connector pins and make the connection.
- Align the battery so that it leaves about the same space to the left and to the right. Press the battery to attach it to the back chassis case using the Velcro strip.
- Power on the unit to check that the battery supplies current to the unit.
Reinstall battery cover and charge the new battery
- Install the battery cover
- Route the battery wires so that they are clear from the edge of the chassis.
- When installing the battery cover to the unit check the serial number on the battery cover is the correct one for the unit.
- Align the battery cover to the chassis case then secure the cover by the two screws.
- Charge the new battery
- A new battery is normally shipped with less than 50% charge.
- Connect AC adapter to the unit to fully charge the battery before use.
Battery disposal