
 First, check if the Lock Screen icon is being displayed on the top-right corner of the screen, if the test set's touch screen seems frozen or irresponsive, to make sure the touch screen has not been accidentally locked or by another user. VeEX test sets have a dedicated
 ![]() /
/![]() Lock Screen button, used to prevent accidental interruptions during long-term tests. Press the Lock Screen button to release it and try again.
Lock Screen button, used to prevent accidental interruptions during long-term tests. Press the Lock Screen button to release it and try again.
If the touch screen is responding erratically, besides using the built-in touch screen (which may not be responding correctly) and its graphical user interface (GUI) to launch the Screen Calibration function directly from the test set, VeEX offers two other alternatives to correct stylus-to-cursor offsets, when it is not possible from the touch panel.
Note: Once the touch screen calibration sequence has been started, it must be completed. Accurately touch each of the calibration points with the tip of the stylus.
Products with capacitive touch screen don't require screen calibration. (e.g., FX92, PX90, WX90.)
A. Use Web Remote
If the test set can still be connected to LAN or Wi-Fi, users can just launch a web browser, from a PC, tablet or smartphone, enter the test set's IP address, select Remote Control, enter the password.
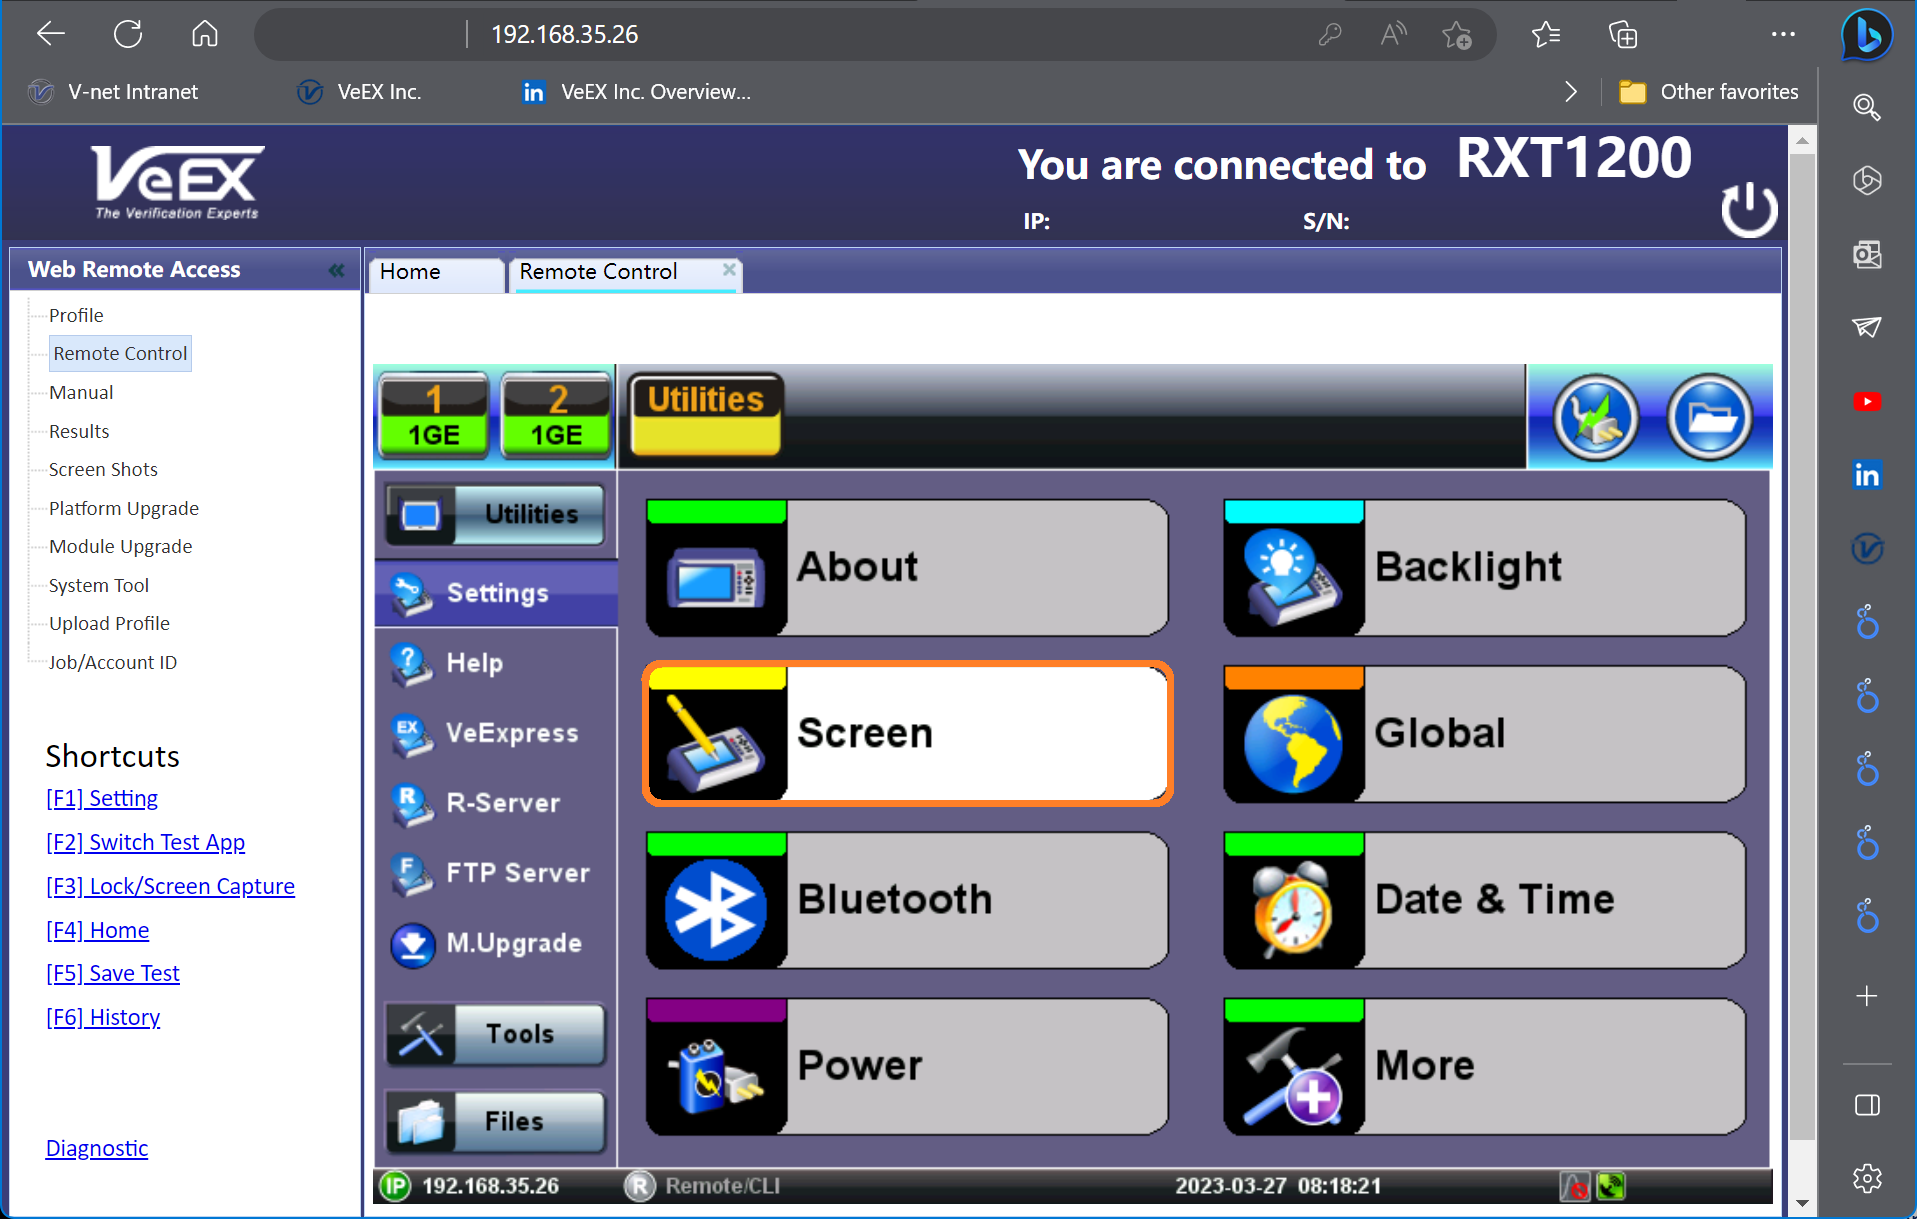
Use the PC's mouse to go to >System Tools >Utilities >Settings, click on the touch Screen calibration function to launch it. Then go back to the test set and use its stylus to accurately tap on all the calibration points, with the tip of the stylus.
B. Use Special Hard Button Combinations
Some test platforms offer a button combination to directly launch the calibration feature.
B.1 V150 Test Platform
 For these small handheld instruments, press the
 ![]() Save and
Save and ![]() Home buttons simultaneously, until you hear a tone (beep), quickly press the LeftSideButton+
Home buttons simultaneously, until you hear a tone (beep), quickly press the LeftSideButton+![]() +
+![]() combination to confirm. Then the touch screen calibration procedure starts.
combination to confirm. Then the touch screen calibration procedure starts.
B.2 MTTplus Modular Test Platform
 Independently of the test module loaded on the MTTpluss chassis, press the
 ![]() History and
History and ![]() Save buttons simultaneously, until you hear a tone (beep), quickly press the same
Save buttons simultaneously, until you hear a tone (beep), quickly press the same ![]() +
+![]() combination again to confirm. Then the touch screen calibration procedure starts.
combination again to confirm. Then the touch screen calibration procedure starts.

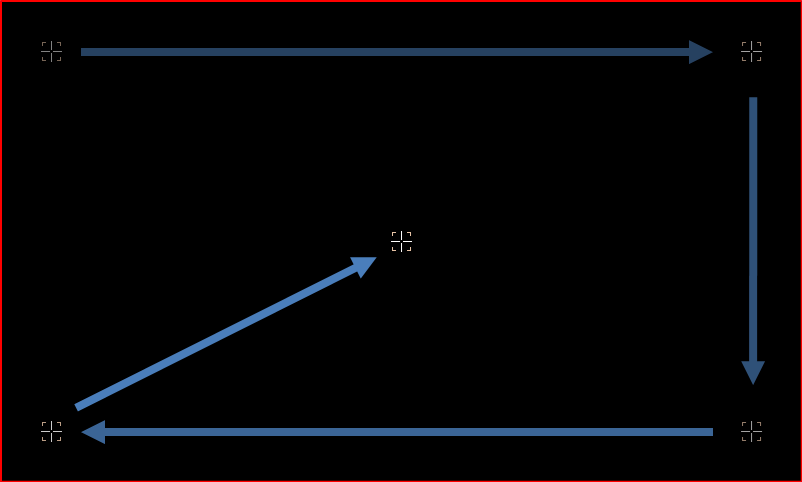
C. Use Navigation Buttons
 On certain products, with rubber
 ![]()
![]()
![]()
![]() cursor keys, users may be able to use the arrows,
cursor keys, users may be able to use the arrows, ![]() Enter and
Enter and ![]() Home buttons to try highlighting (white background) the Screen calibration feature and press
Home buttons to try highlighting (white background) the Screen calibration feature and press ![]() Enter to get it started.
Enter to get it started.

Note: The GUI elements may not be highlighted in a particular order and some highlighted items present subtle differences.
If the above procedures do not fix the touch screen issues, please click on this link to Contact Us, select [√] Customer Service/Tech Support, provide the Product Type, Serial Number and a brief description of the behavior being experienced. If it is related to colder ambient temperatures, please state the approximate temperatures.
Related Test Solutions
- FX120 & FX120 Lite PON Analyzers (for Multi-Gigabit Internet Access Services)
- MTX150x Ethernet Services Installation Test Set
- MTX150x Lite Multi-Gigabit Internet Services & Ethernet Speed Test Solution
- MTTplus Modular Test Platform
- TX300S Multi-service Test Platform
- RXT-1200 Advanced Modular Test Platform